Pumpkin Table Runner

Don’t let those pumpkins fool you, I promise this is a quick and easy project! It is perfect for a beginner or lover of pumpkins and fall; so essentially, everyone!! I think that the pumpkins are great for the table ALL fall, but I CAN NOT WAIT to have it on my table for Thanksgiving……my absolute FAVORITE holiday! Little things like this help make holidays a bit more special when we are spending them separated from our dearest family members.
I have broken the table runner down step by step and included references photos as well to make it even easier! This project can definitely be completed in an afternoon, so there is still PLENTY of time to have it on your table before your family’s Thanksgiving dinner too!
Pumpkin Table Runner Materials:
Fabric A (back piece)
Fabric B (front background)
Fabric C (pumpkins)
Fabric D (stems)
Sewing Machine
Iron
Thread to match background fabric
Cut all fabric to dimensions and {numbers of pieces} listed below-
FABRIC A: (back piece- white with orange/black dots in photo below)
{1} 32.5” x 16.5”
FABRIC B: (front background- black with white specks in photo below)
{4} 4.5” x 2.5”
{4} 2.5” x 2.5” then cut in half diagonally so {8} pieces total
{3} 10.5” x 4.5”
{2} 32.5” x 3.5”
FABRIC C: (pumpkins- orange in photo below)
{2} 10.5” x 8.5”
FABRIC D: (stems- green in photo below)
{2} 2.5” x 2.5”
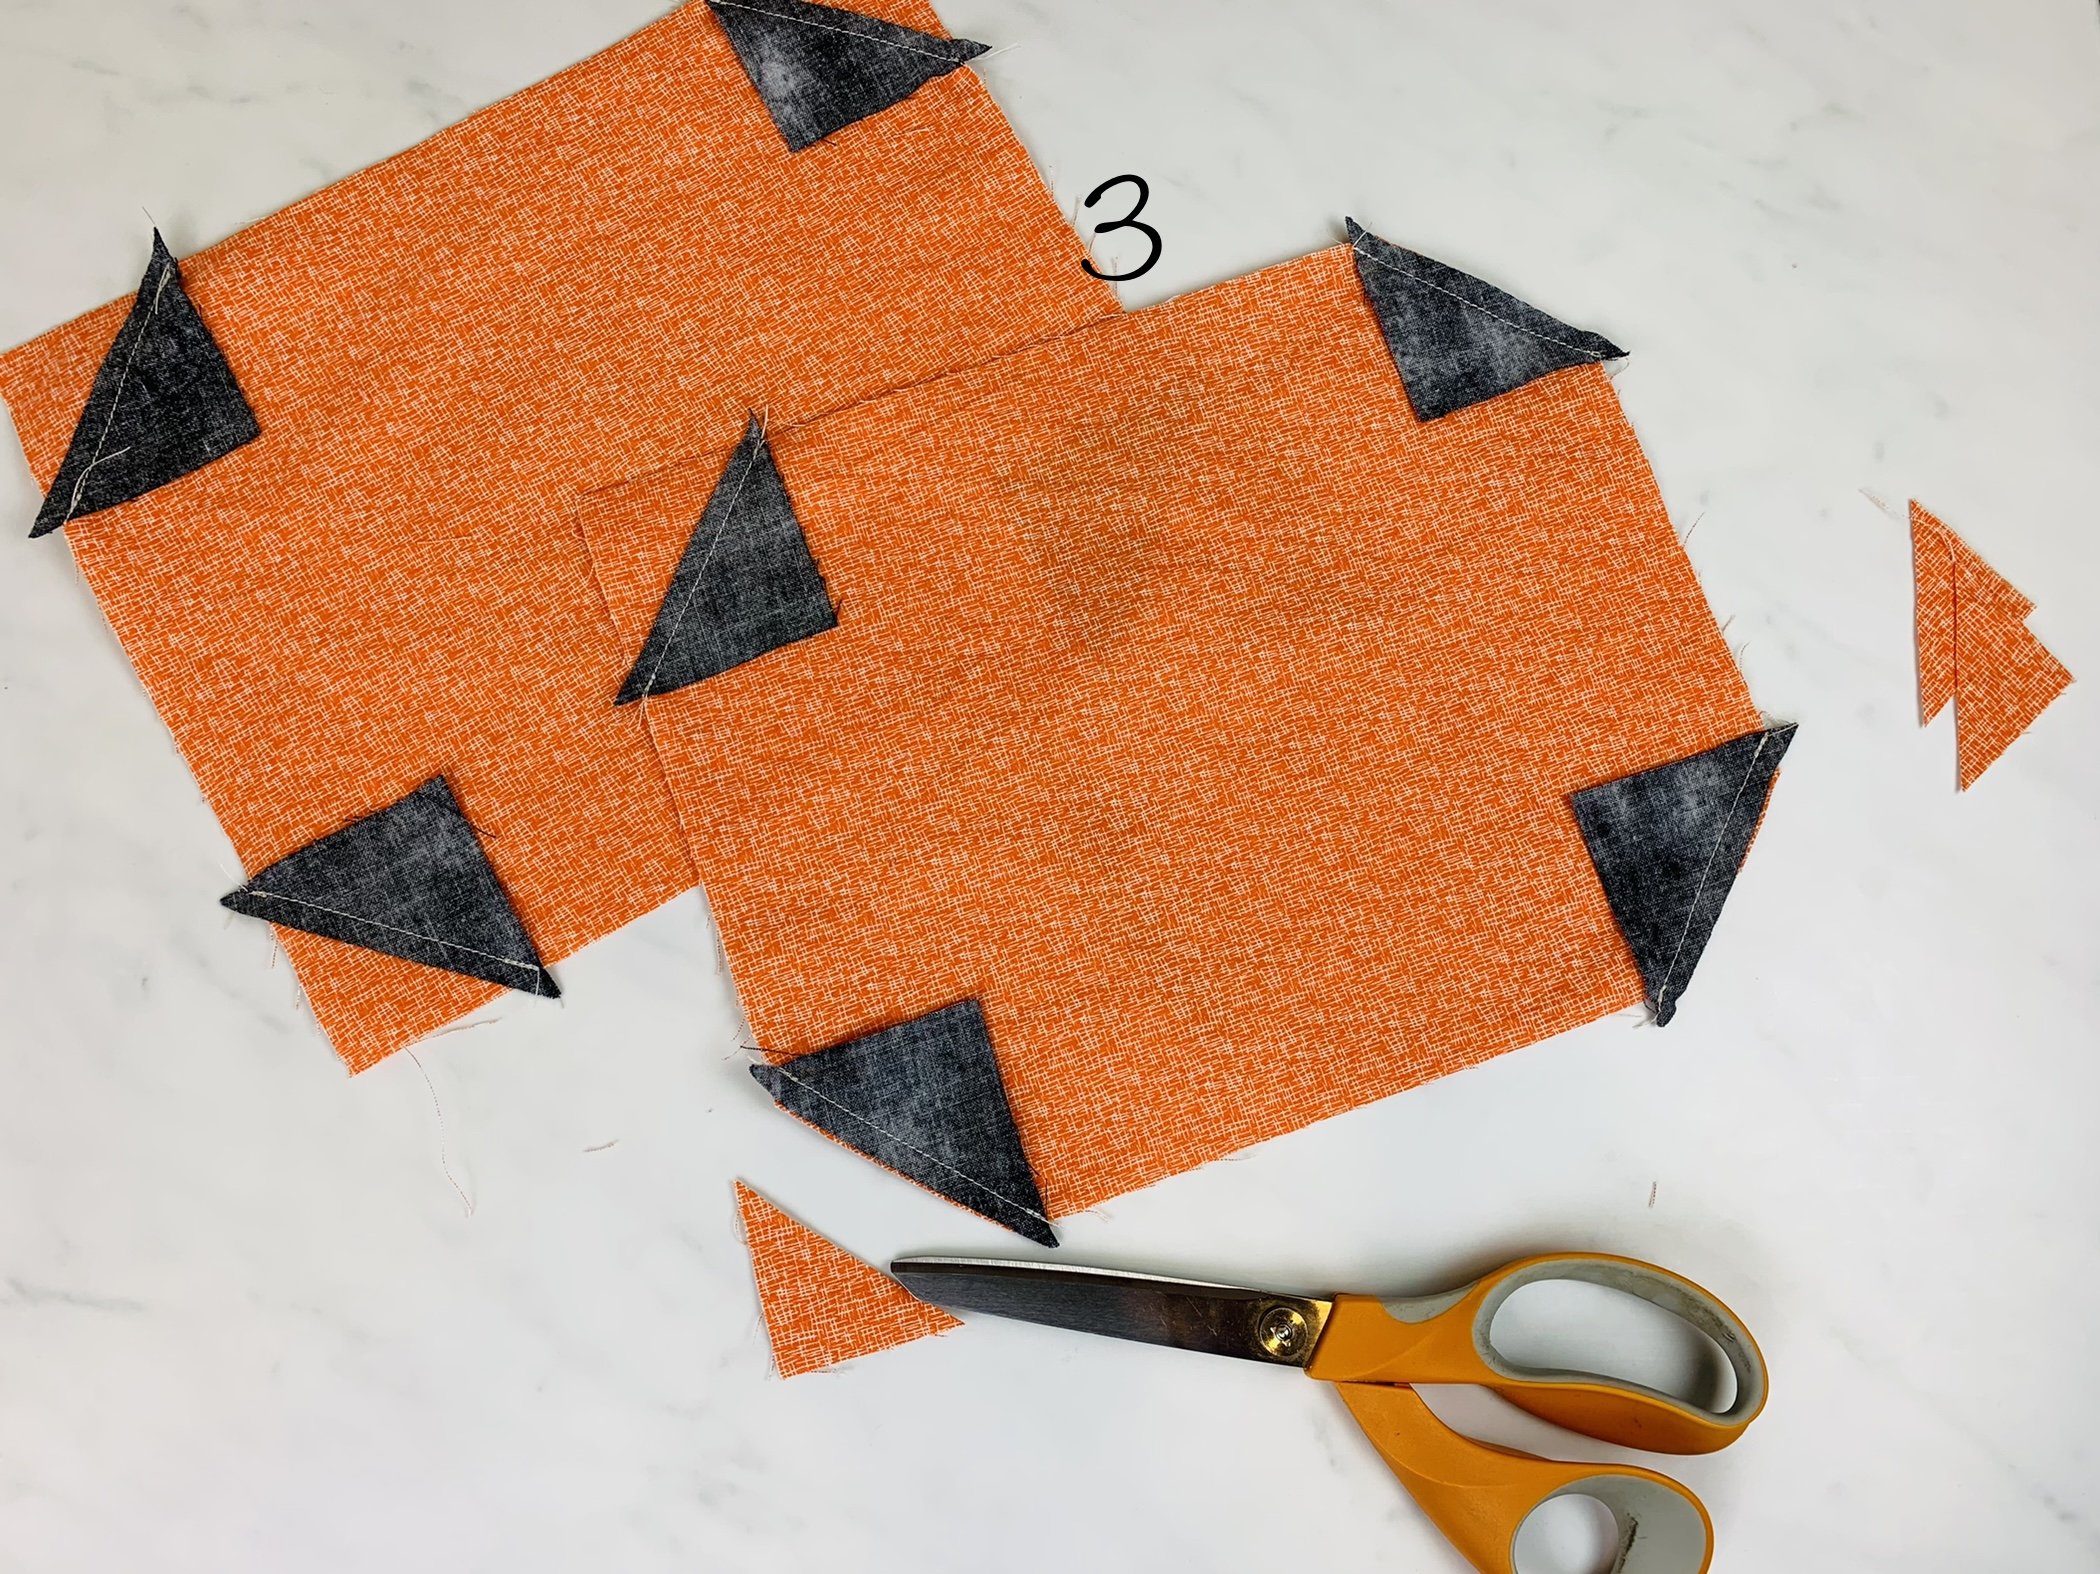
Use a pencil, chalk, or marker to mark a small dot 1 3/4” down/over from each corner on the pumpkin pieces (fabric C); this will give you a reference point to match the edge of the {8} triangle pieces (fabric B) up to the pumpkin pieces, right sides together as shown in photo 2 below. Sew each piece with 1/4” seam allowance.
After sewing, cut excess orange fabric (each corner) as shown in photo 3 below. Set aside.
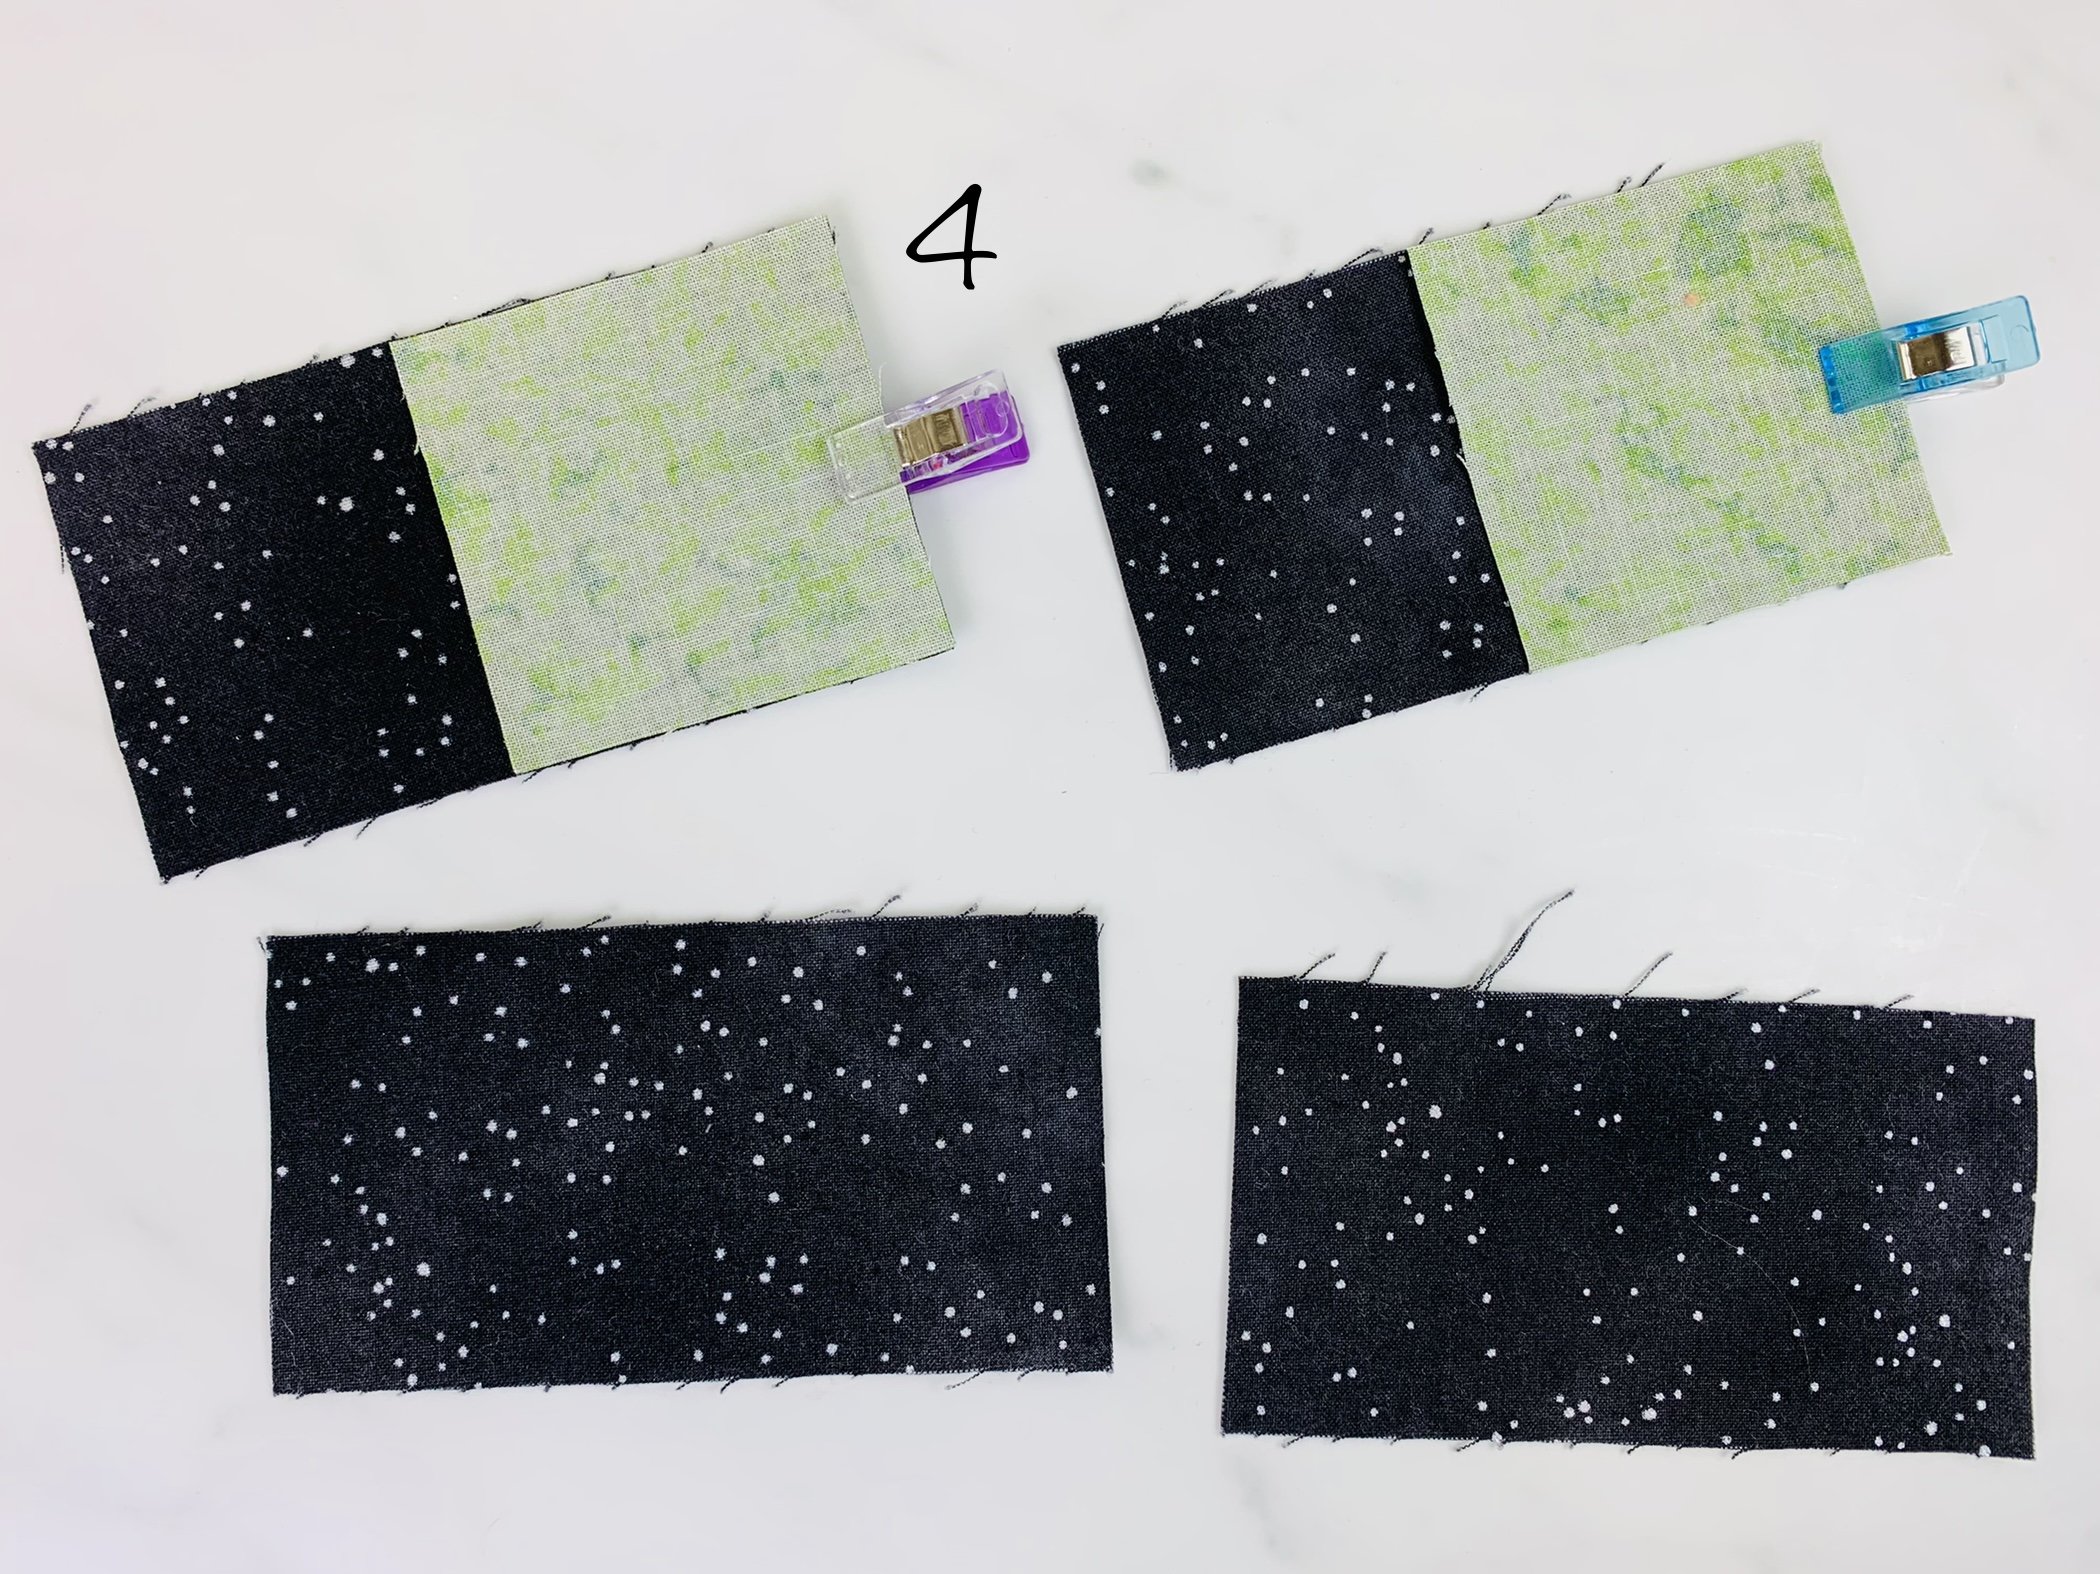
Next, you will need the {4} 4.5” x 2.5” (fabric B) pieces and {2} stem pieces (fabric D); with right sides together, place a background piece to the stem piece and a second background piece at the opposite side, sew with 1/4” seam allowance; repeat for second stem piece. Reference photo 4 and 5 below
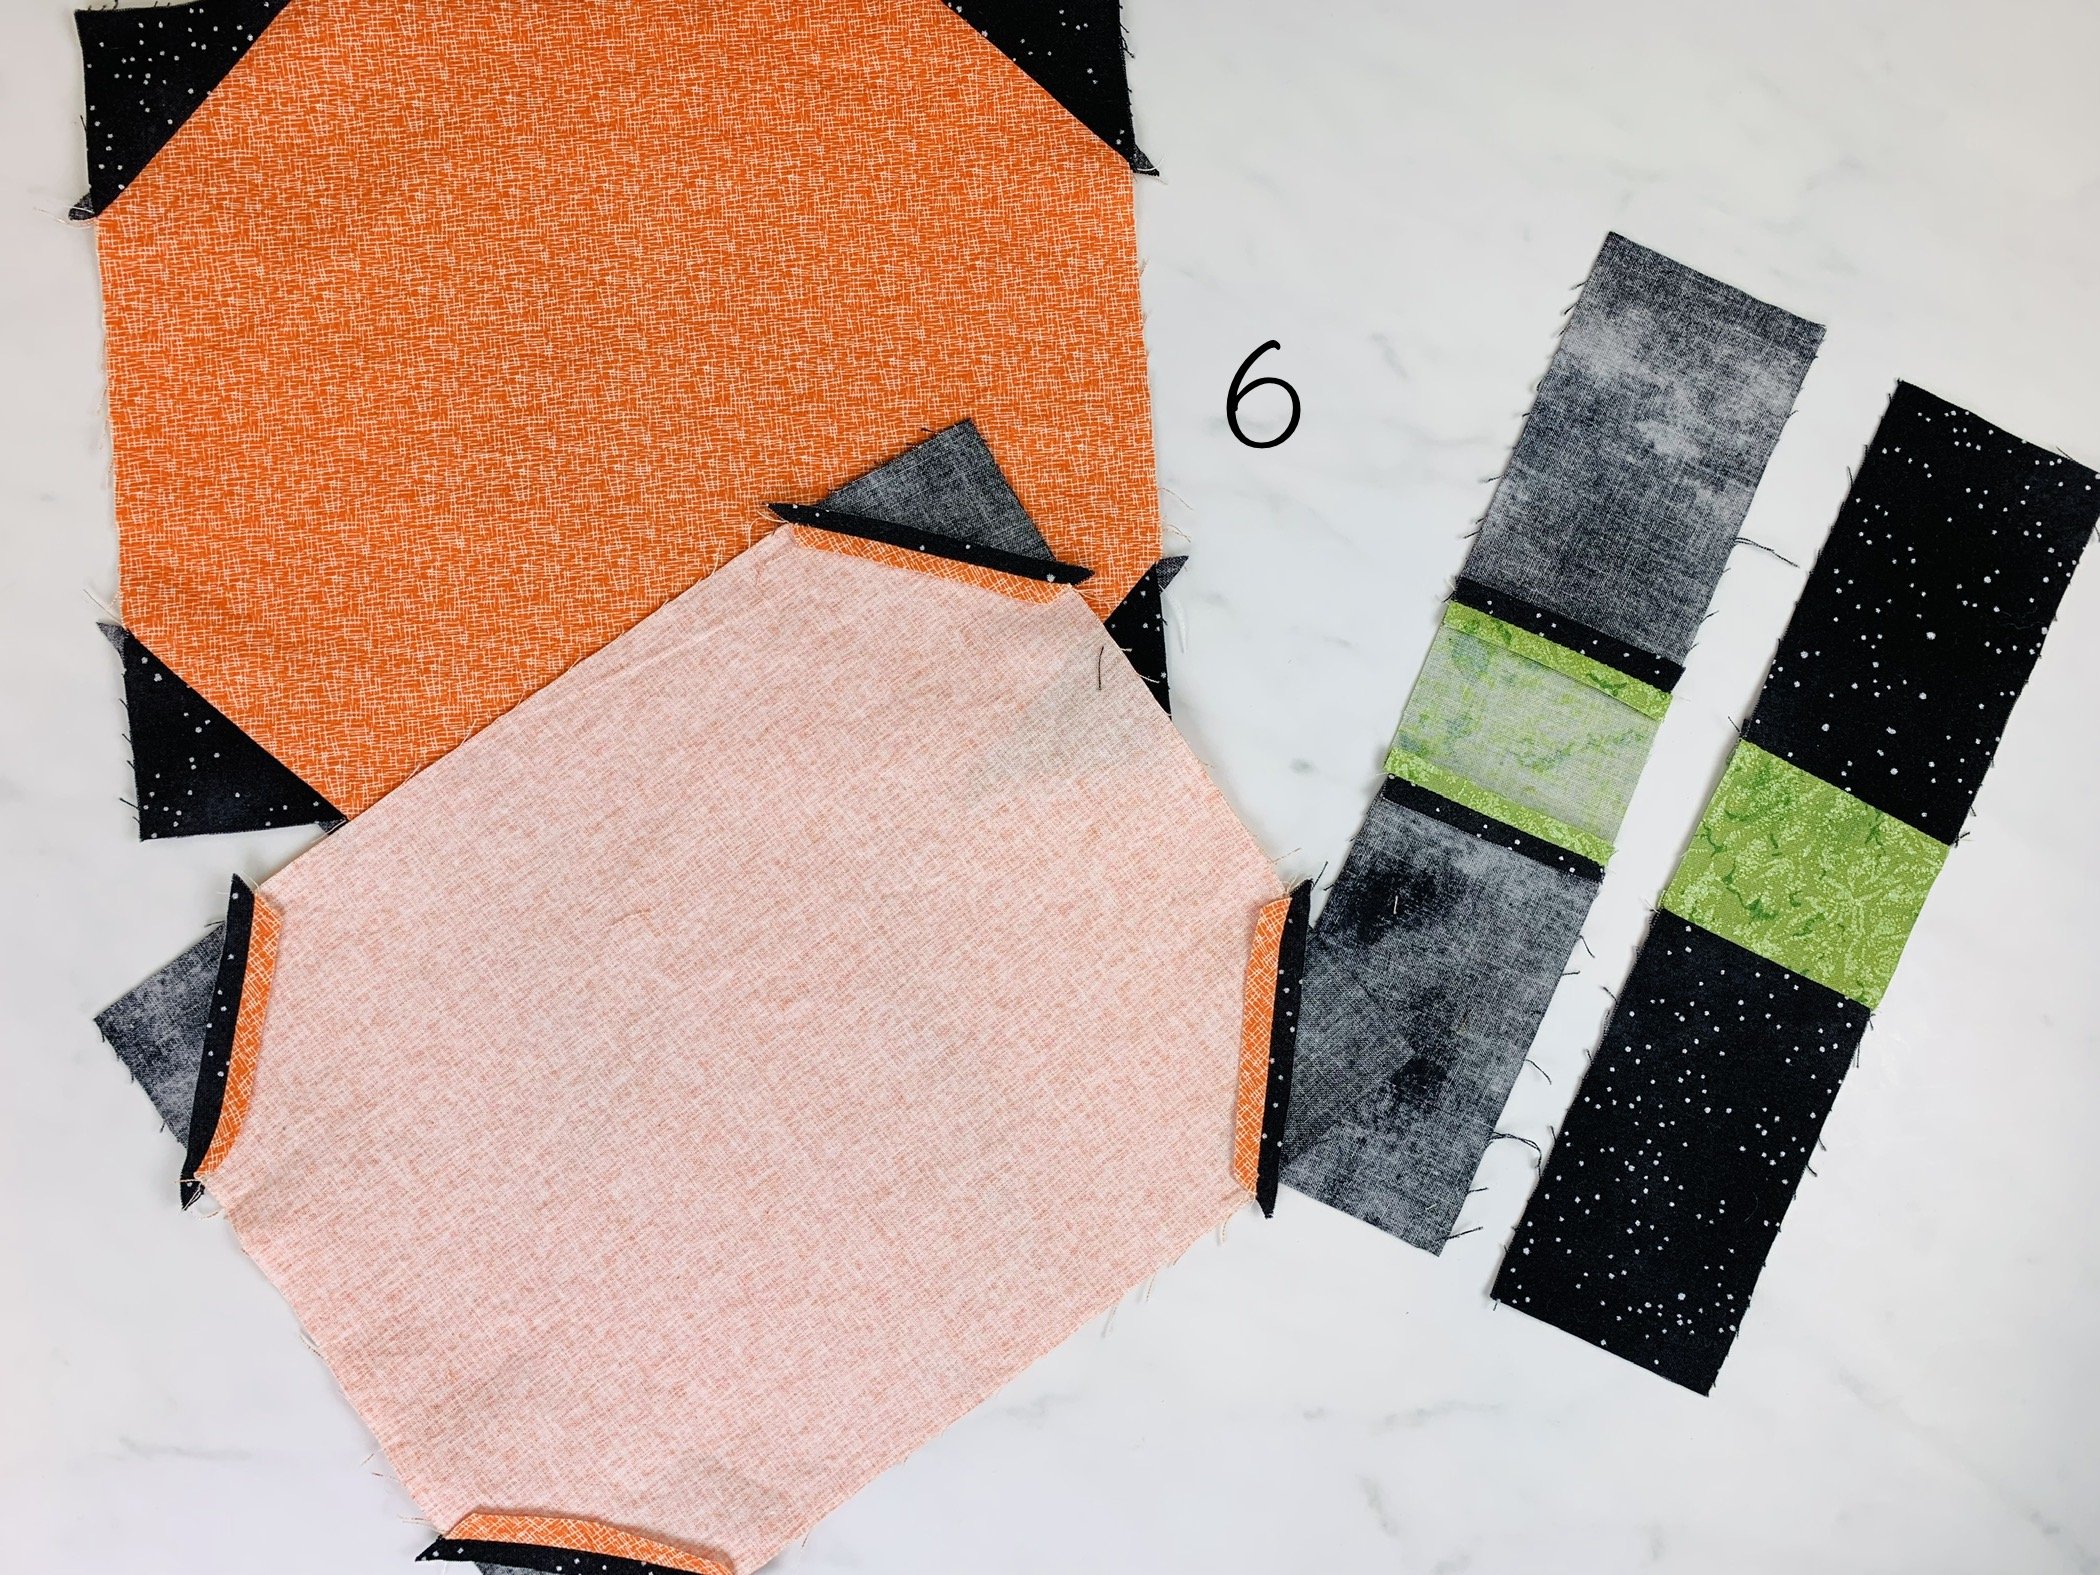
Iron seams open/flat on pumpkin pieces and stem pieces; photo 6 below
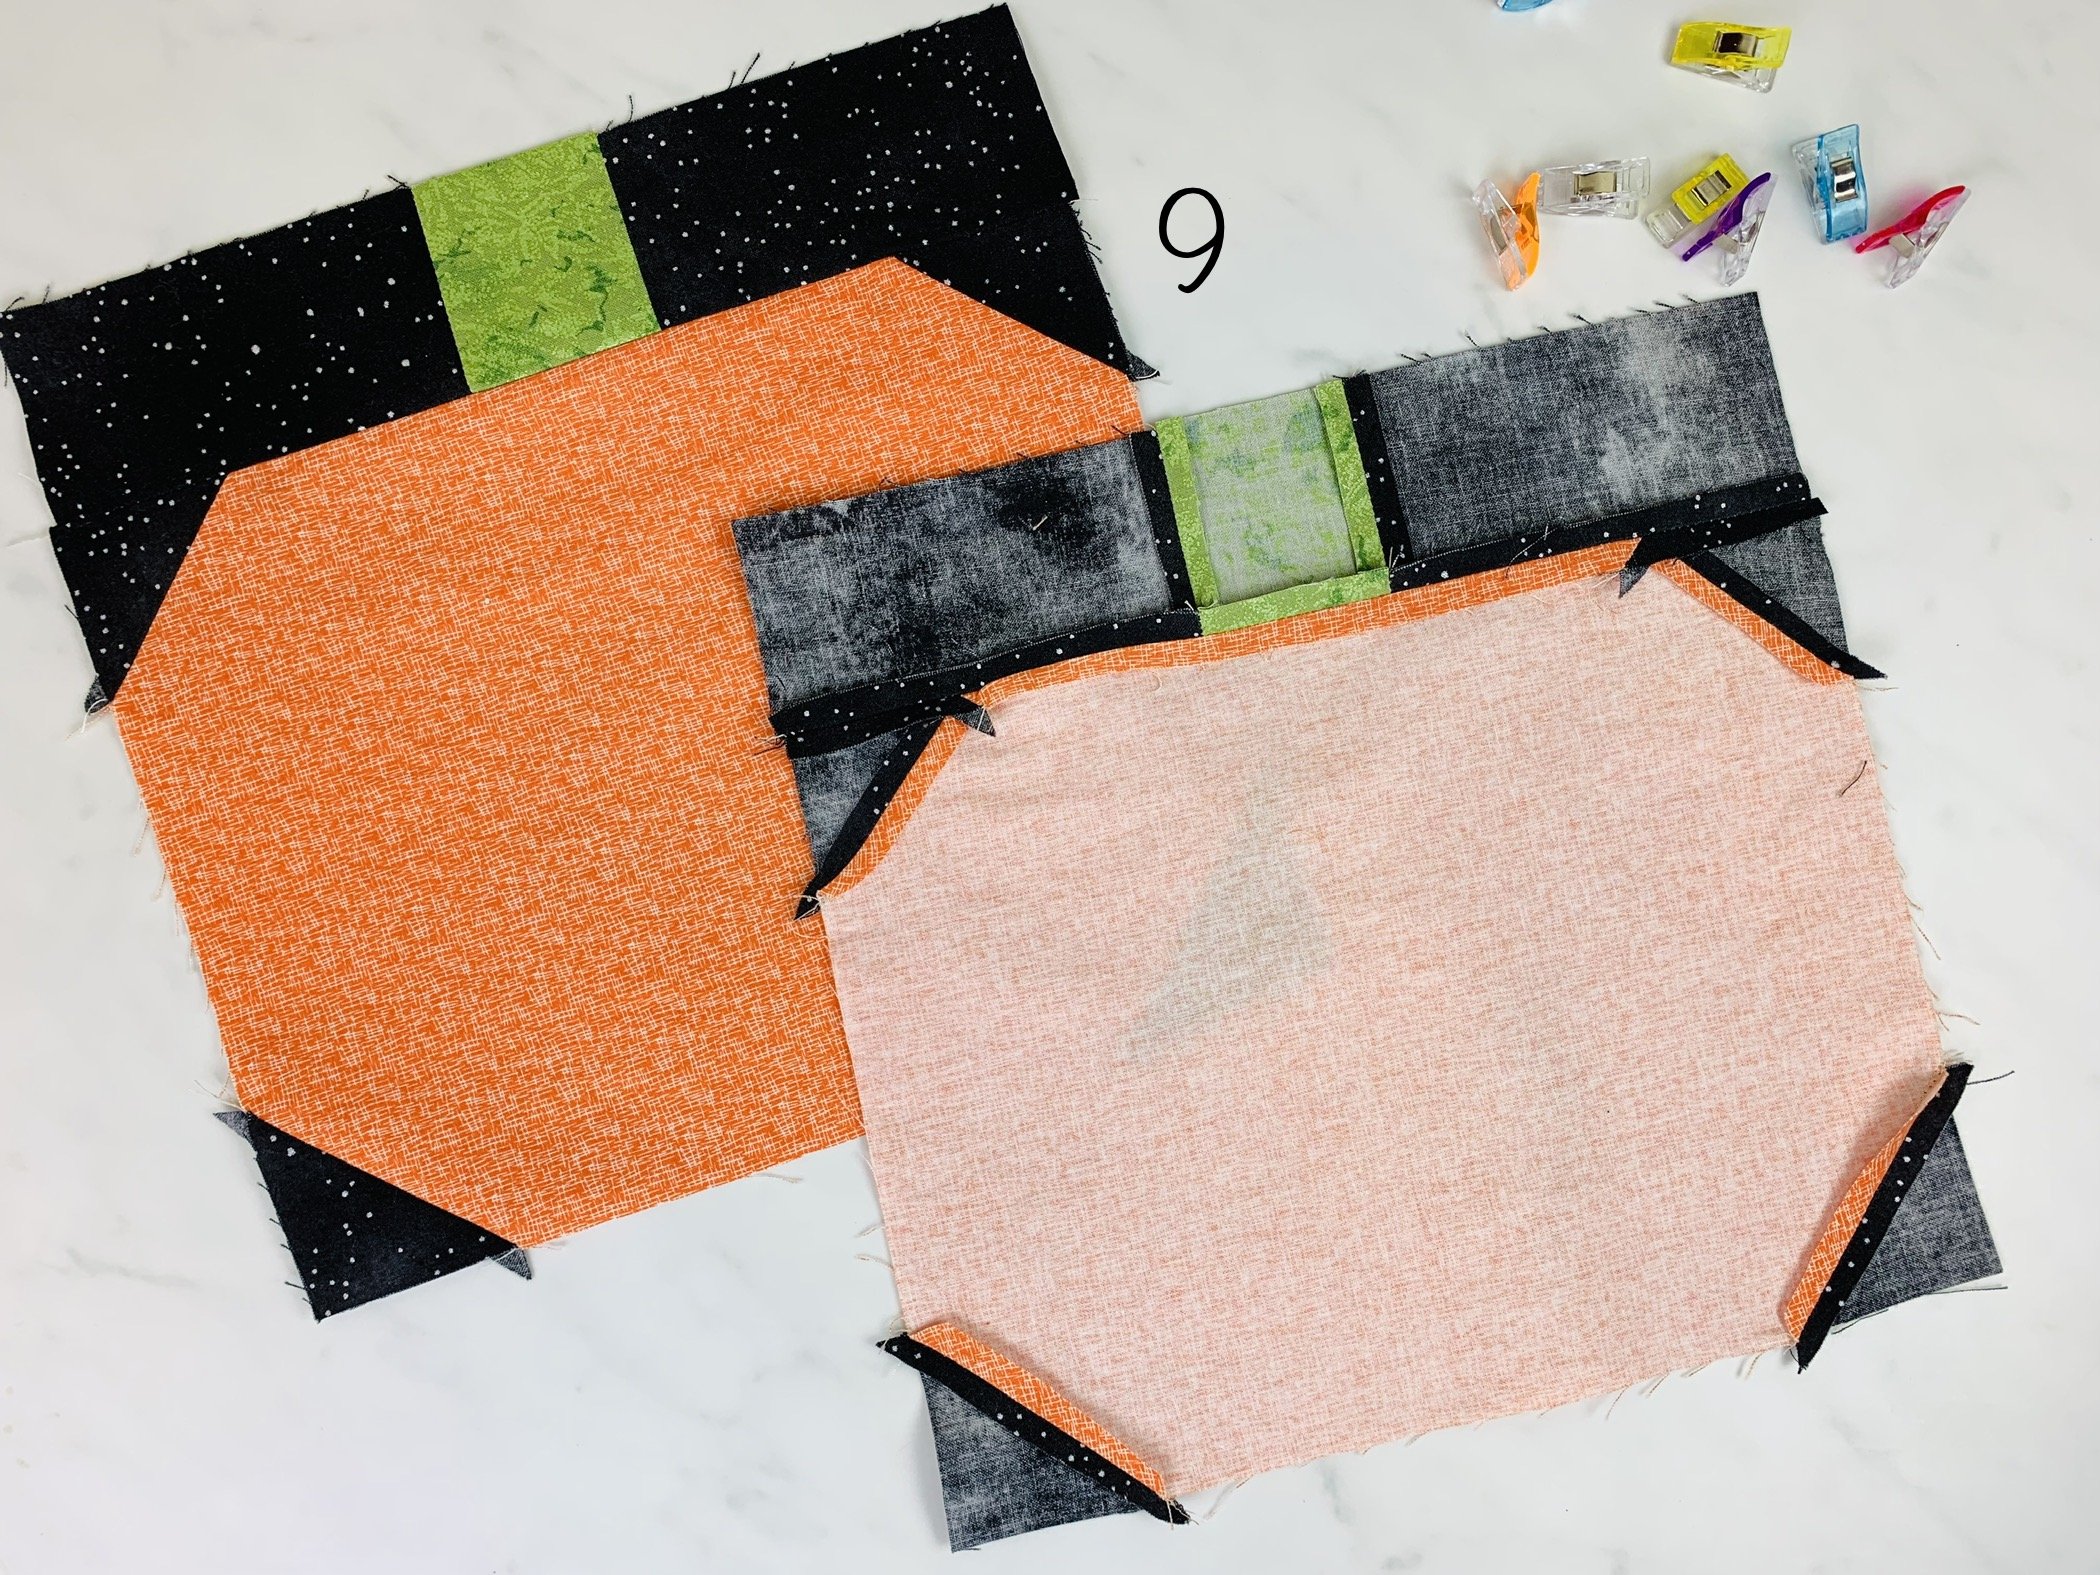
Line up stem piece with long edge/top of pumpkin piece, right sides together; sew with 1/4” seam allowance; press seams open/flat; photos 7, 8, and 9 below
We will now attach the {3} 10.5” x 4.5” pieces (fabric B) to the short sides of the pumpkin pieces; with right sides together place one of the pieces of fabric B on the left edge of the first pumpkin piece, clip, place a second piece of fabric B on the right edge of the first pumpkin piece, clip; place the third piece of fabric B to the left edge of the second pumpkin piece, clip. Sew each piece with 1/4” seam allowance. Photo 10 below
Line up the right edge of the second pumpkin piece (only side without fabric B sewn to the short edge) to the left side of the piece of fabric B that was just attached to the first pumpkin piece, clip and sew. Photos 11, 12, and 13 below
Iron all seams open/flat
With right sides together line one 32.5” x 3.5” piece of fabric B up with the top edge of the pumpkins, clip, line the second piece of fabric B up with the bottom edge of the pumpkins, clip; sew. Photo 14 below
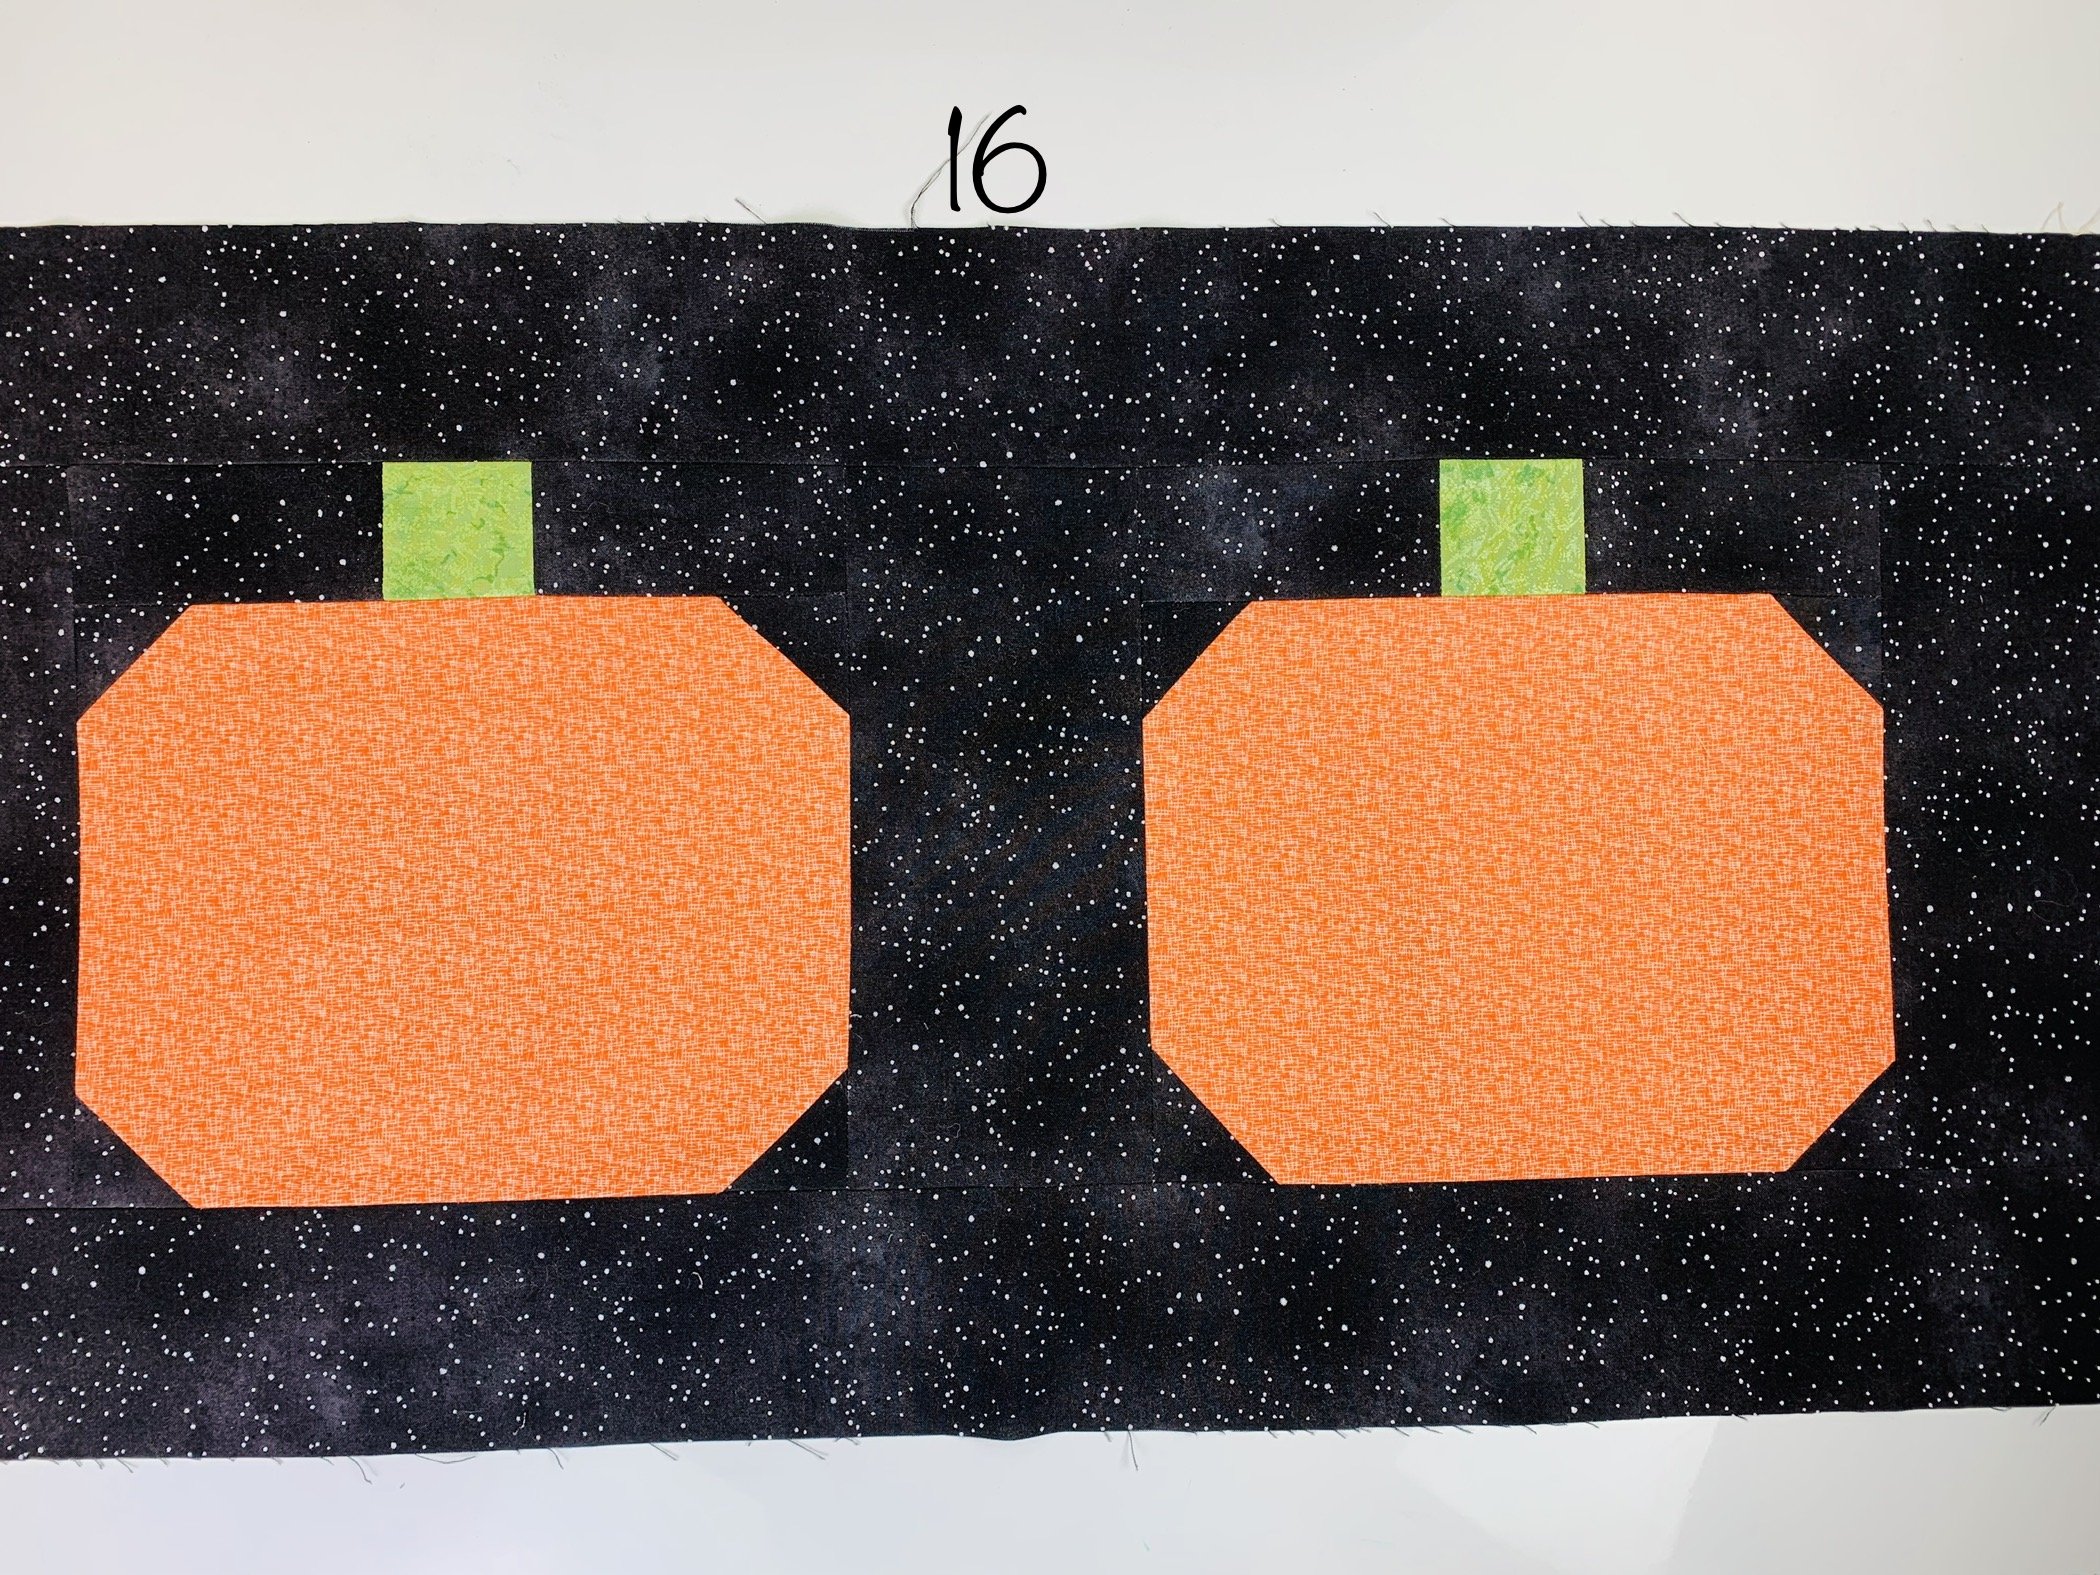
Iron seams open/flat, and iron the entire top of the table runner. Photo 15 and 16 below
Place the pumpkins and back fabric (fabric A) right sides together, be sure they are smooth and straight; trim any excess back fabric if needed; clip. Leave an opening in the bottom center so you can turn the table runner right side out after sewing; it’s easiest to place extra clips in this area so you don’t forget as you sew. Photo 17 below
Sew all the way around table runner with 1/4” seam allowance, be sure to leave opening at the bottom center for turning. Cut extra fabric at corners. Photo 18 below
Use the opening to turn table runner right side out, making sure corners are all the way out (gently use a pencil if needed). Iron, run edges between fingers to make sure seams are all the way out before ironing for crisp edges/corners. Fold edges of fabric in and iron for the opening so it lines up with the seams
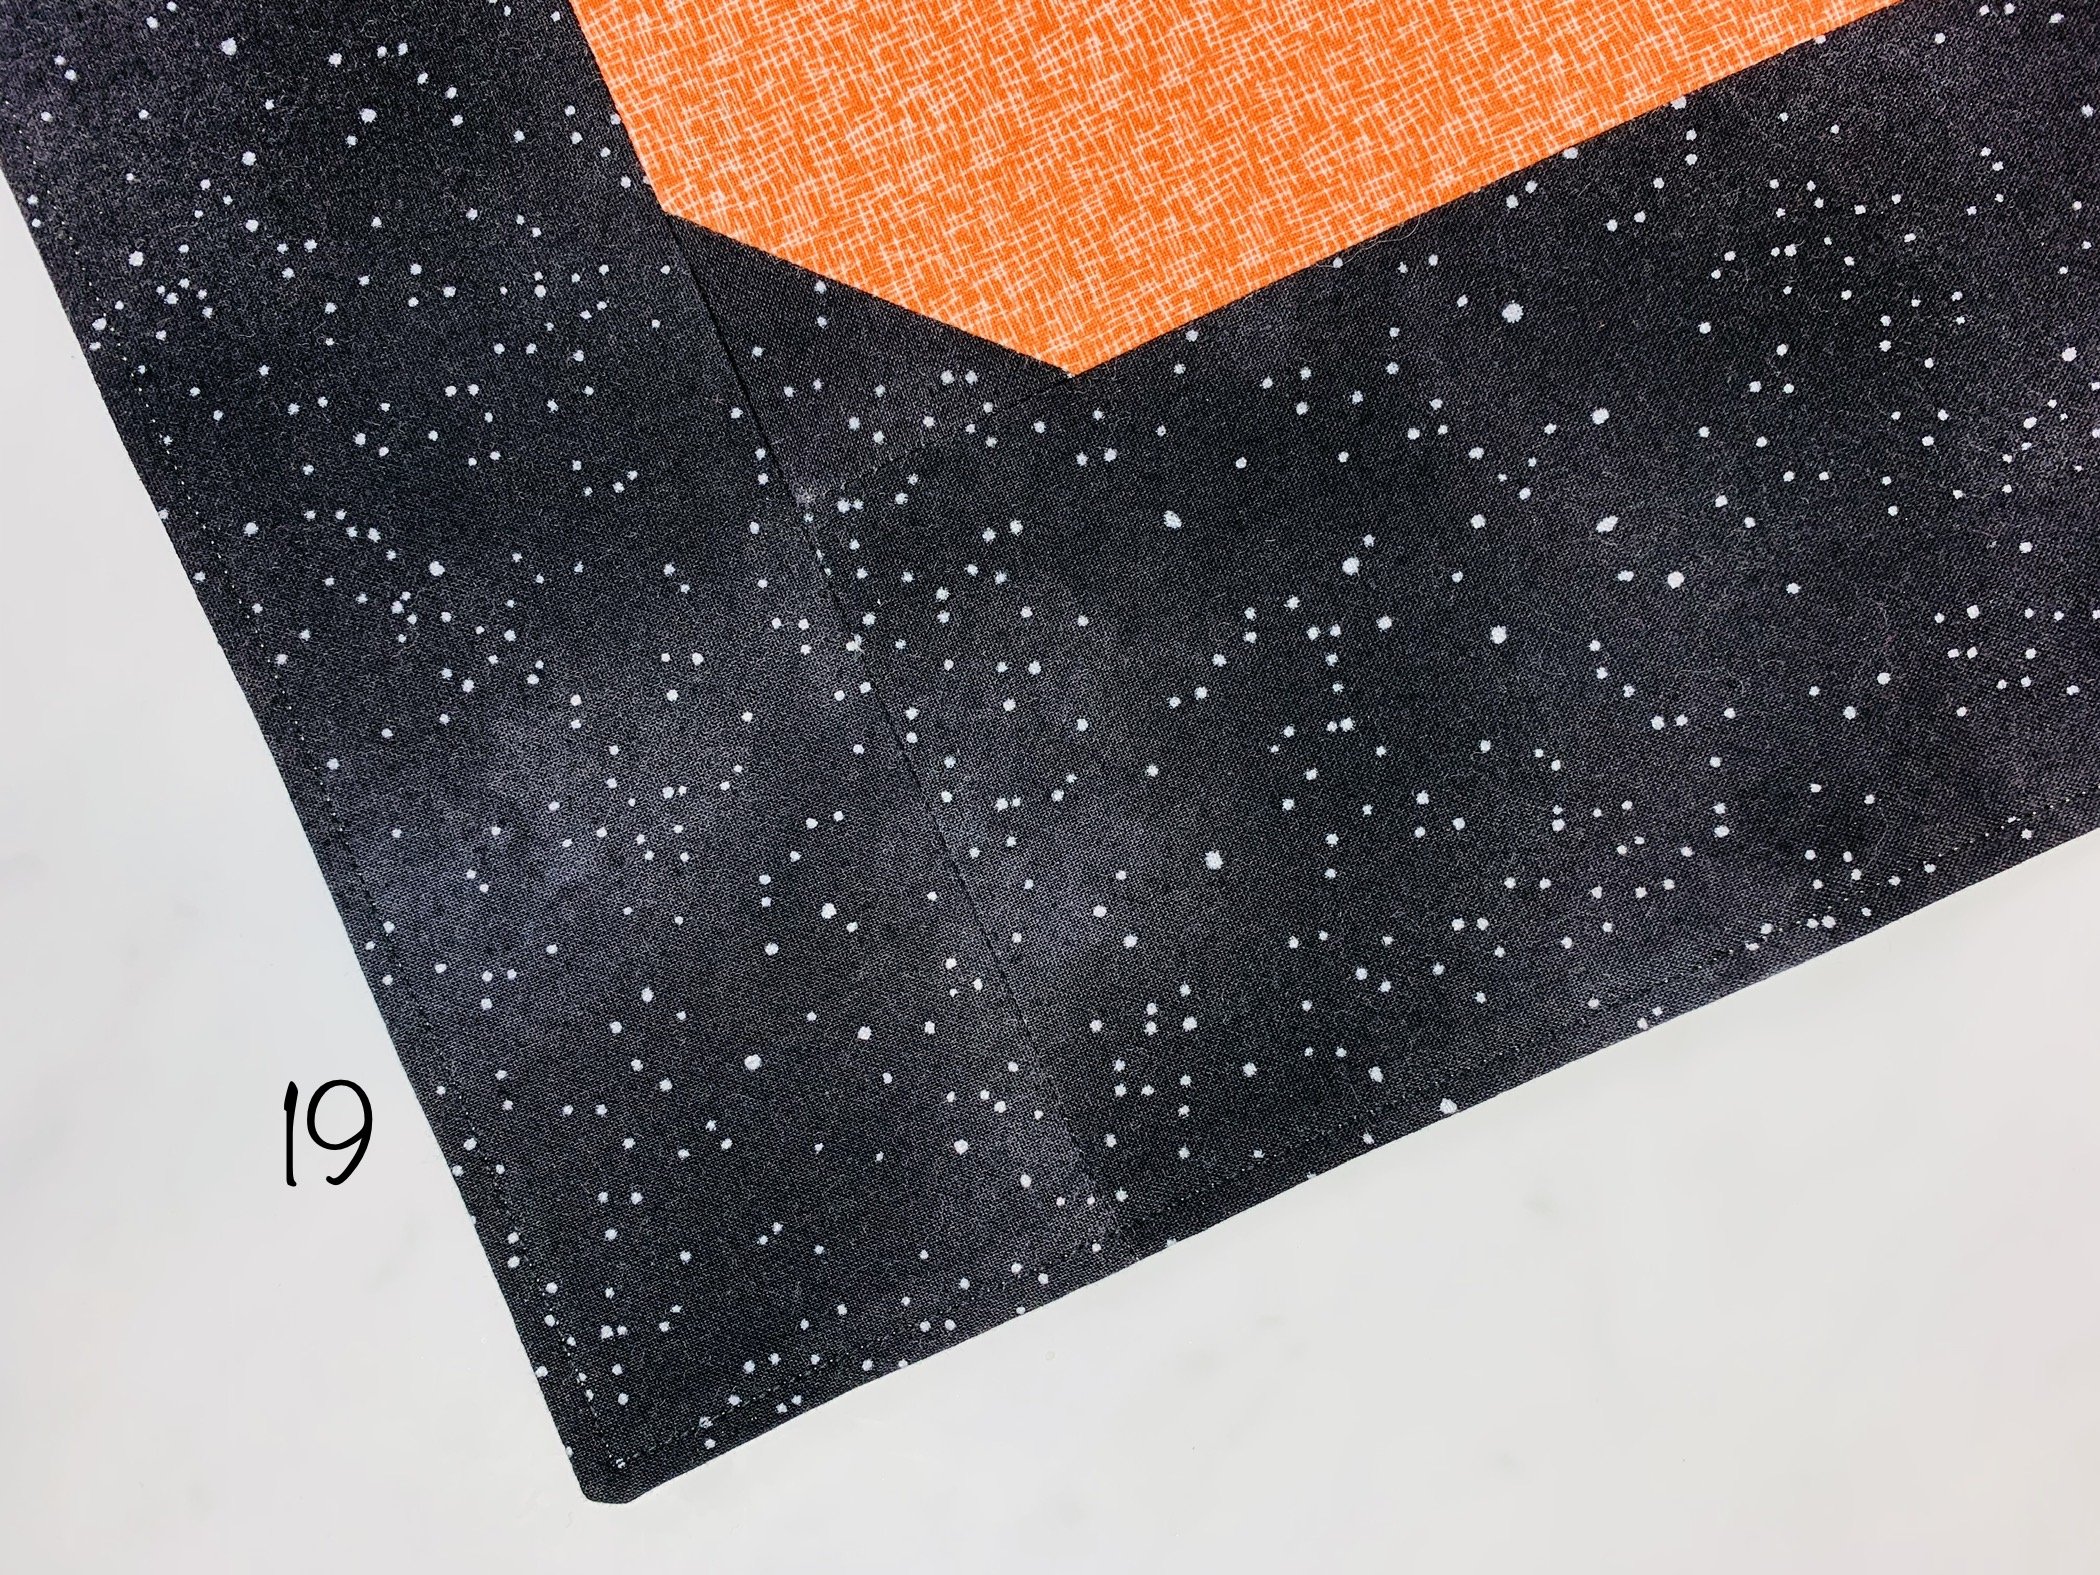
Top stitch all around edges of table runner to finish. Photo 19 below